Puff Pastry Tarts With Raspberry Filling
These puff pastry tarts have crisp, flaky layers, a bright raspberry center, and a thin vanilla glaze. Frozen pastry keeps the prep simple, while a short chill helps each tart keep a neat shape in the oven.
I have made filled pastries for busy brunch tables, family snacks, and small holiday trays. The same lesson works each time: cold pastry is easier to cut, fill, and seal. When the dough turns soft or sticky, a brief rest in the fridge brings it back to a firm, workable state.
Why You Will Love These Puff Pastry Tarts
This Easy Pop Tart Recipe uses store-bought puff pastry and a short list of pantry items. The filling takes less than a minute to mix. You can change the jam, cut new shapes, add icing, or serve the tarts plain.
- Crisp pastry with a soft fruit center
- Only 20 minutes of hands-on prep
- A simple recipe for new bakers
- Easy to shape for birthdays and holidays
- Good for breakfast, brunch, dessert, or snack time
- Freezer-friendly before baking
Recipe at a Glance
| Item | What You Need | Why It Matters |
|---|---|---|
| Pastry | 2 cold puff pastry sheets | Cold dough gives the tarts clean edges and flaky layers. |
| Filling | Raspberry jam mixed with cornstarch | A thick filling is less likely to run through the seams. |
| Top | Egg wash and coarse sugar | The top bakes to a rich golden shade with a light crunch. |
| Finish | Vanilla icing | A thick glaze stays on the cooled pastry. |
Ingredients
| Ingredient | Amount | Kitchen Note |
|---|---|---|
| Frozen puff pastry | 2 sheets | Thaw until flexible, but keep it cold. |
| Seedless raspberry jam | 1/2 cup | Use a thick jam for tidy centers. |
| Cornstarch | 1 teaspoon | It helps the warm jam stay thick. |
| Large egg | 1 | Use it for the border and golden top. |
| Water | 1 tablespoon | Mix it with the egg. |
| Coarse sugar | 1 tablespoon, optional | Add it before baking for a crisp top. |
| Ingredient | Amount | Kitchen Note |
|---|---|---|
| Powdered sugar | 1 cup | Sift it when it has small lumps. |
| Milk | 1 to 2 tablespoons | Add it a few drops at a time. |
| Vanilla extract | 1/2 teaspoon | It adds a soft bakery flavor. |
| Freeze-dried raspberries | 1 tablespoon, optional | Crush them and add them on top. |
| Sprinkles | As needed | Add them before the icing sets. |
How to Make Puff Pastry Tarts
Heat the Oven
Set the oven to 400°F or 200°C. Line a large baking sheet with parchment paper.
Mix the Raspberry Filling
Stir the raspberry jam and cornstarch in a small bowl. The cornstarch helps the warm jam stay thicker while the tarts bake.
Cut the Pastry
Place the cold pastry sheets on a lightly floured work surface. Cut each sheet into eight equal rectangles. You will have 16 pieces for eight filled tarts.
Work at a steady pace. Return the pastry to the fridge for a few minutes when it starts to feel soft or sticky.
Add the Raspberry Jam
Place eight pastry rectangles on the lined baking sheet. Spoon about 1 tablespoon of filling into the center of each piece. Leave a 1/2-inch border around the filling.
Do not add extra jam. Too much filling can push through the seams during baking.
Seal the Tarts
Beat the egg with 1 tablespoon of water. Brush a small amount around each pastry border.
Place the remaining pastry rectangles on top. Press the edges with your fingers, then crimp them with a fork. Cut two or three small vents in each top.
Brush the tops with egg wash. Add coarse sugar when you want a crisp, sweet top.
Chill Before Baking
Place the filled tarts in the fridge for 10 minutes. This short chill helps the pastry hold its shape.
Bake
Bake for 17 to 20 minutes, or until the tops look puffed and deep golden brown. Let the tarts rest on the pan for 5 minutes, then move them to a wire rack.
Let them cool before adding icing. Warm pastry can melt the glaze.
How to Make Homemade Pop Tart Frosting
Add the powdered sugar, 1 tablespoon of milk, and vanilla to a bowl. Stir until smooth. Add a few drops of milk at a time when the glaze feels too thick.
Spread or drizzle the frosting over the cooled tarts. Top with crushed freeze-dried raspberries or sprinkles. Keep the glaze thick enough to sit on the pastry instead of running down the sides.
Easy Pop Tart Recipe Tips
Keep the Dough Cold
Puff pastry should feel cool and firm, but it should still bend without cracking. Warm dough can stick and bake with less lift.
Leave a Clean Border
Jam on the border can stop the top and bottom pieces from sealing. Wipe away any filling before adding the top layer.
Cut Steam Vents
Small cuts let hot steam leave the center. They also lower the chance of a split seam.
Use Parchment Paper
Jam can leak and turn sticky on the pan. Parchment paper makes cleanup much easier.
Watch the Color
Pale puff pastry may still taste raw in the center. Bake until the top and sides have a rich golden shade.
Cool Before Icing
Warm pastry melts the glaze. Let the tarts cool on a rack before adding frosting.
Homemade Raspberry Pop-tarts and Filling Ideas
Raspberry jam gives these puff pastry tarts a sweet-tart center. Keep the same method and change the filling when you want a new flavor.
| Flavor | Filling | Top |
|---|---|---|
| Lemon raspberry | Raspberry jam with 1 teaspoon lemon zest | Lemon glaze |
| Peach | Homemade peach jam | Vanilla glaze |
| Blueberry | Thick blueberry jam | Lemon glaze |
| Apricot almond | Apricot jam | Sliced almonds |
| Pistachio | A thin layer of homemade pistachio cream | Powdered sugar |
| Apple cinnamon | Thick apple butter | Cinnamon sugar |
| Chocolate strawberry | Chocolate spread and a small spoonful of strawberry jam | Chocolate drizzle |
Use thick fillings. Thin syrup or juicy raw fruit may soak the pastry and leak through the edges.
Homemade Heart-shaped Pop Tarts
Use a large heart cookie cutter and cut an even number of pieces. Add a small spoonful of jam, brush the border with egg wash, add the top heart, and crimp the edge with a fork.
Stack Of Homemade Pop Tarts
Let the icing set before stacking the tarts. Place small sheets of parchment between each layer and add fresh berries around the plate.
Diy Poptarts Easy Shape Ideas
Rectangles, squares, hearts, and circles are easy to fill and seal. Mini squares work well on party trays, while long bars are good for dipping.
Home Made Pop Tarts Easy Filling Guide
Use about 1 tablespoon of filling for a standard tart. Small tarts may need only 1 to 2 teaspoons.
Homemade Pop-tart Ideas for Holidays
Cut hearts for Valentine’s Day, stars for birthdays, and simple squares for school snacks. For a winter pastry with a sweet and savory center, see these Caramelized Pear and Brie Snowflake Puffs.
Homemade Pop Tarts With Phyllo Dough
Phyllo dough gives a different result from puff pastry. Phyllo bakes into thin, crisp sheets, while puff pastry forms thicker, airy layers.
Brush each phyllo sheet with melted butter, stack several sheets, then cut and fill. Cover unused phyllo with a slightly damp kitchen towel because it dries fast. Use a small amount of thick filling and fold the edges well.
Make-Ahead, Storage, and Reheating
| Stage | Storage Method | Time |
|---|---|---|
| Shaped, unbaked tarts | Cover and place in the fridge. Add egg wash before baking. | Up to 24 hours |
| Frozen, unbaked tarts | Freeze on a tray, then move to a sealed freezer bag. | Up to 2 months for best texture |
| Baked tarts | Cool fully, then place in a sealed box in the fridge. | Up to 3 days |
| Reheating | Warm plain tarts at 325°F or 165°C. | 5 to 8 minutes |
Bake frozen tarts straight from the freezer and add a few extra minutes when needed. Iced tarts are best served at room temperature because the glaze can melt during reheating.
For general fridge and freezer times, see the FoodSafety.gov cold storage chart.
Common Problems and Fixes
| Problem | Likely Cause | Simple Fix |
|---|---|---|
| The filling leaked | Too much jam, filling on the border, or a weak seal | Use less jam, clean the border, and crimp the edges firmly. |
| The pastry stayed flat | Warm dough or an oven that was not fully heated | Chill the shaped tarts and heat the oven before baking. |
| The bottom feels soft | Loose filling, a light bake, or storage while warm | Use thick jam, bake until golden, and cool fully before storage. |
| The edges opened | The border was dry or the filling touched the seam | Brush the border lightly with egg wash and keep the filling in the center. |
| The icing ran off | The tarts were warm or the glaze had too much milk | Cool the pastry and add more powdered sugar to the glaze. |
Frequently Asked Questions
Can I use puff pastry for homemade pop tarts?
Yes. Puff pastry makes a light, flaky version of a filled toaster pastry. It has more layers than a classic packaged pop tart.
Can I use fresh raspberries?
Yes, but cook them first with sugar and a little cornstarch. Cool the filling before placing it on the pastry. Raw berries can release too much juice.
Can I skip the egg wash?
Yes, though the tops may look lighter. Milk or cream can add some color, but egg wash gives the deepest golden finish.
Can I put these tarts in a toaster?
No. Jam or icing can leak into a toaster and burn. Reheat the tarts in an oven, toaster oven, or air fryer basket.
Can I make one large tart?
Yes. Place one pastry sheet on a lined pan, add a thin layer of jam inside a clean border, and cover it with a second sheet. Seal the edges, cut vents, and bake until golden. Add more baking time when needed.
What is the best jam for puff pastry tarts?
A thick seedless jam is the easiest choice. Raspberry, strawberry, blueberry, peach, and apricot all work well.
Serving Ideas
Serve puff pastry tarts with coffee, tea, milk, or hot chocolate. For dessert, add fresh berries or a spoonful of whipped cream.
For a brunch table, pair them with Quick Blueberry French Toast Casserole, yogurt, eggs, cheese, and fresh fruit.
For a larger fruit dessert, serve the tarts beside Easy Peach Crisp or Old Fashioned Peach Cobbler.
Related Recipes
Final Baking Note
The best puff pastry tarts start with cold dough, thick filling, sealed edges, and a fully heated oven. Keep the jam in the center and let the baked tarts cool before frosting. These small steps give you crisp layers, a bright raspberry center, and a neat bakery-style finish.
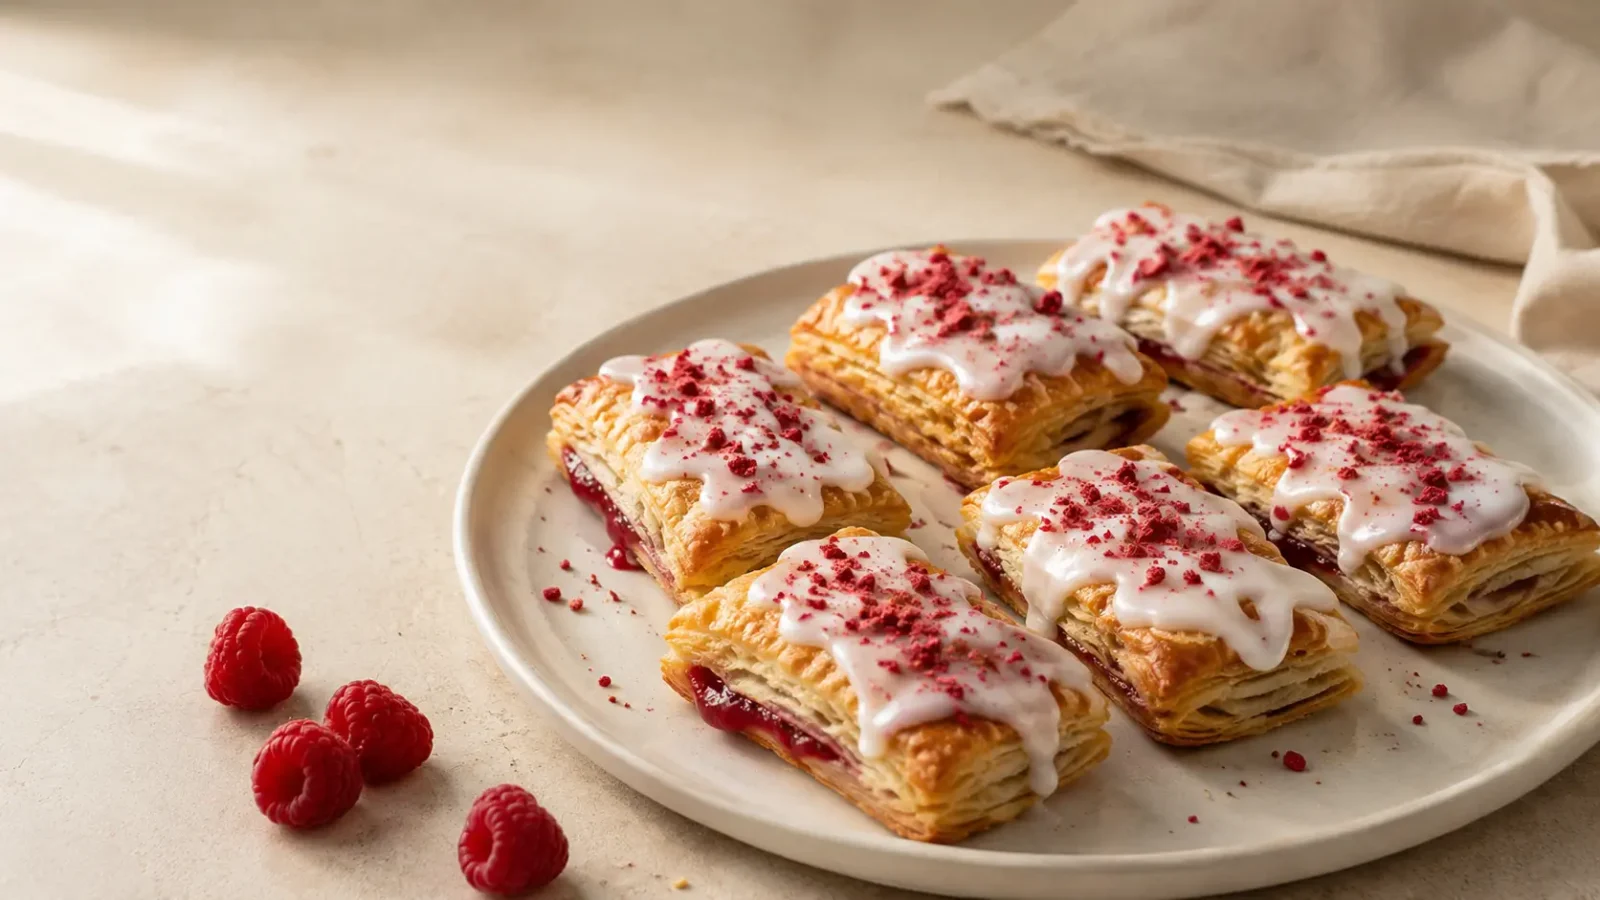
Easy Puff Pastry Tarts With Raspberry Jam
Ingredients
Equipment
Method
- Preheat the oven to 400°F (200°C). Line a large baking sheet with parchment paper.
- Stir the raspberry jam and cornstarch together in a small bowl until evenly combined. Set the filling aside.
- Place the cold puff pastry sheets on a lightly floured work surface. Cut each sheet into eight equal rectangles, creating 16 pieces in total. Refrigerate the pastry briefly if it becomes soft or sticky.
- Arrange eight pastry rectangles on the prepared baking sheet. Place approximately 1 tablespoon of raspberry filling in the center of each rectangle, leaving a clean 1/2-inch (1.25 cm) border around the edges.
- Beat the egg with 1 tablespoon of water. Lightly brush the exposed pastry borders with the egg wash.
- Place the remaining pastry rectangles over the filling. Press the edges together with your fingers, then crimp them firmly with a fork. Cut two or three small steam vents into the top of each tart.
- Brush the tops with the remaining egg wash and sprinkle with coarse sugar, if using. Refrigerate the assembled tarts for 10 minutes to help them maintain their shape.
- Bake for 17 to 20 minutes, until the pastry is puffed and deeply golden. Rest the tarts on the baking sheet for 5 minutes before transferring them to a wire rack to cool completely.
- Combine the powdered sugar, 1 tablespoon of milk, and vanilla extract in a small bowl. Stir until smooth, adding a few drops of additional milk at a time until the glaze is thick but spreadable.
- Spread or drizzle the vanilla glaze over the completely cooled tarts. Immediately garnish with crushed freeze-dried raspberries or sprinkles, if desired. Allow the glaze to set before serving.
Notes
.qk-recipe,
.qk-recipe * {
box-sizing: border-box;
}
.qk-recipe {
max-width: 920px;
margin: 0 auto;
padding: 28px 18px 60px;
color: var(–qk-ink);
font-family: Arial, Helvetica, sans-serif;
font-size: 18px;
line-height: 1.75;
background: var(–qk-white);
}
.qk-recipe h1,
.qk-recipe h2,
.qk-recipe h3 {
line-height: 1.25;
color: var(–qk-berry-dark);
}
.qk-recipe h1 {
margin: 0 0 18px;
font-size: clamp(2.2rem, 6vw, 4rem);
letter-spacing: -0.03em;
}
.qk-recipe h2 {
margin-top: 48px;
padding-bottom: 10px;
font-size: clamp(1.7rem, 4vw, 2.45rem);
border-bottom: 4px solid var(–qk-gold);
}
.qk-recipe h3 {
margin-top: 30px;
font-size: 1.35rem;
}
.qk-recipe a {
color: var(–qk-berry-dark);
font-weight: 700;
text-decoration-thickness: 2px;
text-underline-offset: 3px;
}
.qk-recipe a:hover,
.qk-recipe a:focus {
color: var(–qk-berry);
}
.qk-hero {
position: relative;
overflow: hidden;
padding: 42px;
border: 1px solid #f6c3d6;
border-radius: 28px;
background:
radial-gradient(circle at top right, rgba(244, 189, 61, 0.35), transparent 36%),
linear-gradient(135deg, #fff0f6 0%, #fff9ef 100%);
box-shadow: var(–qk-shadow);
}
.qk-hero::after {
position: absolute;
right: -35px;
bottom: -45px;
width: 180px;
height: 180px;
content: “”;
border-radius: 50%;
background: rgba(180, 35, 90, 0.08);
}
.qk-eyebrow {
display: inline-block;
margin-bottom: 12px;
padding: 7px 13px;
color: var(–qk-white);
font-size: 0.82rem;
font-weight: 800;
letter-spacing: 0.08em;
text-transform: uppercase;
border-radius: 999px;
background: linear-gradient(90deg, var(–qk-berry), var(–qk-peach));
}
.qk-lead {
max-width: 760px;
margin: 0;
color: #4d3540;
font-size: 1.15rem;
}
.qk-note {
margin: 28px 0;
padding: 22px 24px;
border-left: 6px solid var(–qk-berry);
border-radius: 0 16px 16px 0;
background: var(–qk-pink);
}
.qk-note strong {
color: var(–qk-berry-dark);
}
.qk-toc {
margin: 30px 0;
padding: 25px;
border: 1px solid var(–qk-line);
border-radius: var(–qk-radius);
background: var(–qk-cream);
box-shadow: 0 8px 24px rgba(80, 45, 60, 0.08);
}
.qk-toc p {
margin-top: 0;
color: var(–qk-berry-dark);
font-size: 1.2rem;
font-weight: 800;
}
.qk-toc ol {
columns: 2;
gap: 32px;
margin-bottom: 0;
}
.qk-toc li {
margin: 7px 0;
break-inside: avoid;
}
.qk-grid {
display: grid;
grid-template-columns: repeat(3, minmax(0, 1fr));
gap: 14px;
margin: 26px 0;
}
.qk-stat {
padding: 18px;
text-align: center;
border: 1px solid #f0ccd9;
border-radius: 16px;
background: linear-gradient(145deg, #ffffff 0%, #fff2f7 100%);
}
.qk-stat span {
display: block;
color: var(–qk-muted);
font-size: 0.82rem;
font-weight: 700;
text-transform: uppercase;
}
.qk-stat strong {
display: block;
margin-top: 4px;
color: var(–qk-berry-dark);
font-size: 1.1rem;
}
.qk-table-wrap {
overflow-x: auto;
margin: 26px 0 34px;
border: 1px solid var(–qk-line);
border-radius: var(–qk-radius);
box-shadow: var(–qk-shadow);
}
.qk-table {
width: 100%;
min-width: 620px;
border-collapse: collapse;
background: var(–qk-white);
}
.qk-table caption {
padding: 18px 20px;
color: var(–qk-white);
font-size: 1.2rem;
font-weight: 800;
text-align: left;
background: linear-gradient(90deg, var(–qk-berry-dark), var(–qk-berry), var(–qk-peach));
}
.qk-table th {
padding: 15px 17px;
color: var(–qk-white);
font-size: 0.92rem;
text-align: left;
background: #5f2441;
}
.qk-table td {
padding: 14px 17px;
vertical-align: top;
border-bottom: 1px solid var(–qk-line);
}
.qk-table tbody tr:nth-child(even) {
background: #fff7fa;
}
.qk-table tbody tr:hover {
background: #fff0c9;
}
.qk-table tbody tr:last-child td {
border-bottom: 0;
}
.qk-list-card {
margin: 24px 0;
padding: 24px 26px;
border: 1px solid #cfe7dc;
border-radius: var(–qk-radius);
background: var(–qk-mint);
}
.qk-list-card ul {
margin-bottom: 0;
}
.qk-step-list {
counter-reset: qkstep;
padding: 0;
list-style: none;
}
.qk-step {
position: relative;
margin: 24px 0;
padding: 24px 24px 24px 82px;
border: 1px solid #ecd5df;
border-radius: var(–qk-radius);
background: linear-gradient(145deg, #ffffff, #fff8fb);
box-shadow: 0 8px 22px rgba(90, 30, 57, 0.07);
counter-increment: qkstep;
}
.qk-step::before {
position: absolute;
top: 22px;
left: 22px;
display: grid;
width: 44px;
height: 44px;
place-items: center;
content: counter(qkstep);
color: var(–qk-white);
font-weight: 800;
border-radius: 50%;
background: linear-gradient(135deg, var(–qk-berry), var(–qk-peach));
box-shadow: 0 7px 16px rgba(180, 35, 90, 0.24);
}
.qk-step h3 {
margin: 0 0 8px;
}
.qk-tip-grid,
.qk-card-grid {
display: grid;
grid-template-columns: repeat(2, minmax(0, 1fr));
gap: 18px;
margin: 24px 0;
}
.qk-tip,
.qk-card {
padding: 22px;
border-radius: 18px;
box-shadow: 0 8px 22px rgba(64, 34, 47, 0.07);
}
.qk-tip {
border: 1px solid #f0d796;
background: #fff9e8;
}
.qk-card {
border: 1px solid #cddff4;
background: var(–qk-blue);
}
.qk-tip h3,
.qk-card h3 {
margin-top: 0;
}
.qk-callout {
margin: 34px 0;
padding: 26px;
color: #3d2530;
border: 2px dashed var(–qk-peach);
border-radius: var(–qk-radius);
background: linear-gradient(120deg, #fffaf0, #fff0f5);
}
.qk-callout h2,
.qk-callout h3 {
margin-top: 0;
border: 0;
}
.qk-faq details {
margin: 14px 0;
border: 1px solid var(–qk-line);
border-radius: 14px;
background: var(–qk-white);
box-shadow: 0 6px 18px rgba(71, 35, 51, 0.06);
}
.qk-faq summary {
padding: 18px 20px;
color: var(–qk-berry-dark);
font-weight: 800;
cursor: pointer;
}
.qk-faq details p {
margin: 0;
padding: 0 20px 20px;
}
.qk-related {
display: grid;
grid-template-columns: repeat(2, minmax(0, 1fr));
gap: 16px;
margin-top: 24px;
}
.qk-related a {
display: block;
padding: 20px;
border: 1px solid #f0cbd9;
border-radius: 16px;
background: linear-gradient(135deg, #fff6fa, #fffaf0);
box-shadow: 0 7px 18px rgba(86, 28, 55, 0.08);
}
.qk-source-box {
margin-top: 44px;
padding: 22px 24px;
border-radius: 16px;
background: #f7f7f8;
color: #49424a;
font-size: 0.94rem;
}
.qk-source-box h2 {
margin-top: 0;
font-size: 1.35rem;
border-bottom-width: 3px;
}
.qk-jump {
display: inline-block;
margin-top: 20px;
padding: 12px 18px;
color: var(–qk-white) !important;
text-decoration: none;
border-radius: 999px;
background: linear-gradient(90deg, var(–qk-berry-dark), var(–qk-berry));
box-shadow: 0 8px 18px rgba(127, 18, 63, 0.22);
}
@media (max-width: 760px) {
.qk-hero {
padding: 30px 23px;
}
.qk-grid,
.qk-tip-grid,
.qk-card-grid,
.qk-related {
grid-template-columns: 1fr;
}
.qk-toc ol {
columns: 1;
}
.qk-step {
padding: 72px 20px 22px;
}
.qk-step::before {
top: 18px;
left: 20px;
}
}