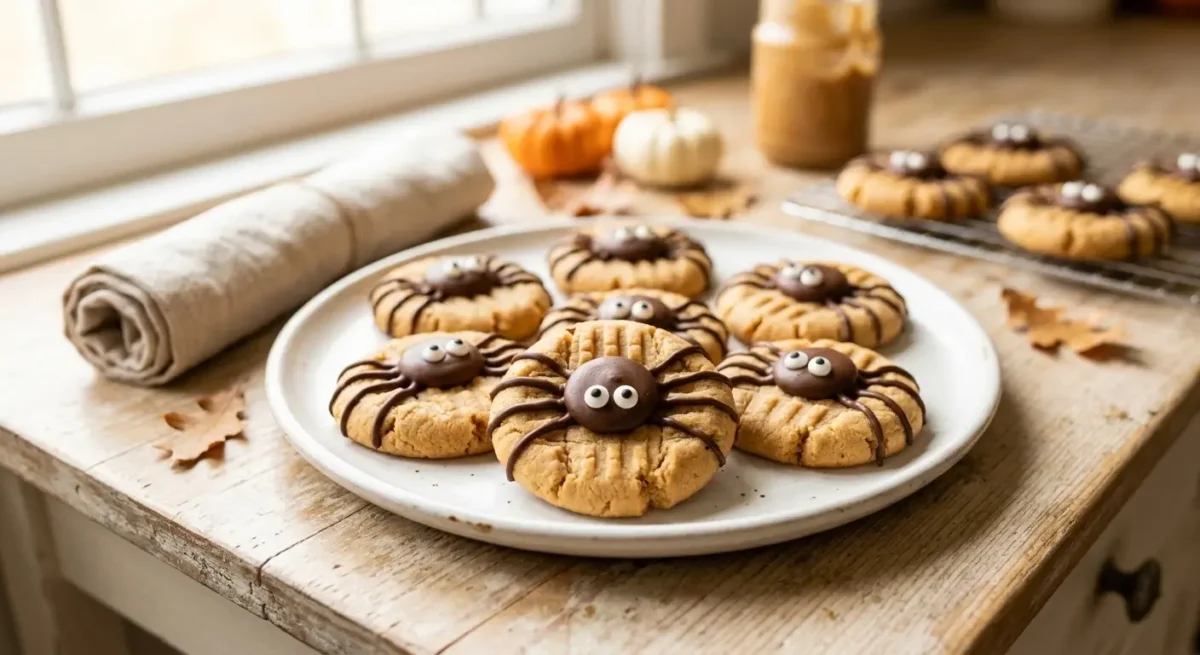
These Peanut Butter Spider Cookies are a fun and easy Halloween dessert made with soft peanut butter cookies, chocolate, and candy eyes. This Peanut Butter Spider Cookies recipe turns a classic peanut butter cookie into a cute Halloween spider with just a few simple decorating steps.
If you are looking for easy peanut butter spider cookies for a Halloween party, school event, family gathering, or fall baking day, this recipe is a great choice. The cookies are soft, rich, beginner-friendly, and easy to decorate.
Why You’ll Love These Peanut Butter Spider Cookies
These Halloween spider cookies are simple enough for beginner bakers but fun enough to make for a Halloween party.
- Easy to make: The cookie dough comes together with basic baking ingredients.
- Soft and chewy: Peanut butter gives these cookies a rich flavor and tender texture.
- Fun Halloween design: Chocolate and candy eyes create an adorable spider look.
- Kid-friendly: Kids can help add the chocolate bodies and candy eyes.
- Party-ready: These cookies make a fun addition to a Halloween dessert table.
- Make-ahead friendly: Bake the cookies ahead and decorate them when needed.
What Are Peanut Butter Spider Cookies?
Peanut Butter Spider Cookies are homemade peanut butter cookies decorated to look like spiders.
A chocolate candy is placed in the center of each cookie to create the spider’s body. Melted chocolate is then piped around the candy to make the legs, while candy eyes complete the design.
Unlike complicated decorated sugar cookies, these easy spider cookies do not require advanced icing techniques. The simple chocolate decoration makes them a great Halloween baking project for beginners.
Ingredients for Peanut Butter Spider Cookies

For the Peanut Butter Cookies
You will need:
- All-purpose flour
- Baking soda
- Salt
- Unsalted butter, softened
- Creamy peanut butter
- Granulated sugar
- Brown sugar
- Large egg
- Vanilla extract
For the Spider Decoration
You will also need:
- Chocolate-covered peanut butter candies
- Semi-sweet chocolate or chocolate melting wafers
- Candy eyes
For the best texture, use creamy peanut butter. It creates a smooth dough that is easy to mix and shape.
How to Make Peanut Butter Spider Cookies
1. Make the Cookie Dough
Preheat the oven to 350°F (175°C) and line a baking sheet with parchment paper.
Whisk the flour, baking soda, and salt together in a medium bowl.
In a separate bowl, beat the softened butter, peanut butter, granulated sugar, and brown sugar until creamy.
Add the egg and vanilla extract and mix until combined.
Gradually add the dry ingredients and mix just until a soft dough forms. Avoid overmixing.
2. Shape the Cookies
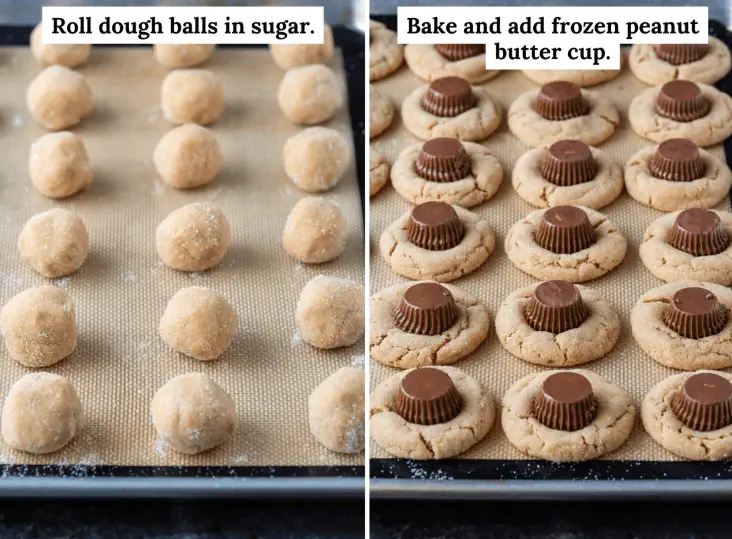
Scoop the dough into small portions and roll each portion into a ball.
Place the dough balls on the prepared baking sheet, leaving space between them.
Using a cookie scoop helps create evenly sized peanut butter spider cookies that bake at the same rate.
3. Bake the Cookies
Bake for about 10–12 minutes, or until the edges are lightly golden and the centers still look slightly soft.
Do not overbake the cookies. They will continue to firm up as they cool.
Let the cookies rest on the baking sheet for a few minutes after removing them from the oven.
4. Add the Spider Body
While the cookies are still warm, gently press one chocolate candy into the center of each cookie.
Press carefully to avoid cracking the cookie.
Allow the cookies to cool completely before decorating them with chocolate legs.
5. Create the Spider Legs
Melt the semi-sweet chocolate according to the package directions.
Transfer the melted chocolate to a small piping bag or a zip-top bag with a tiny corner cut off.
Pipe thin chocolate lines around the chocolate body to create the spider legs.
For the cleanest result, keep the chocolate lines thin and let the cookies cool completely before decorating.
6. Add the Candy Eyes
Place two candy eyes on each chocolate spider body.
If the chocolate has started to set, use a tiny amount of melted chocolate to help secure the eyes.
Let the chocolate decoration set before serving.
Tips for the Best Peanut Butter Spider Cookies
Use Creamy Peanut Butter
Creamy peanut butter gives the dough a smooth texture and makes these cookies easier to shape.
Do Not Overbake
For soft peanut butter Halloween cookies, remove them when the edges are set and the centers still look slightly soft.
Decorate While the Cookies Are Warm
Press the chocolate candy into the cookies shortly after they come out of the oven. The warmth helps the candy adhere to the cookie.
Let Cookies Cool Before Adding the Legs
The cookies should be completely cool before piping the spider legs. Otherwise, the melted chocolate can spread.
Make Thin Spider Legs
Thin chocolate lines create a cleaner spider shape and are easier to control.
Use a Cookie Scoop
A cookie scoop helps make cookies that are similar in size, which means they will bake more evenly.
How to Store Peanut Butter Spider Cookies
Store the finished Halloween spider cookies in an airtight container at room temperature.
If you need to stack them, place parchment paper between the layers to protect the chocolate decorations.
Keep the container in a cool, dry place away from direct sunlight or heat.
For general food handling and storage guidance, see the USDA Food Safety and Inspection Service.
Can You Freeze Peanut Butter Spider Cookies?
Yes. These easy peanut butter spider cookies can be frozen.
For the best appearance, freeze the baked cookies before adding the chocolate decoration.
Let the cookies cool completely, then place them in a freezer-safe container with parchment paper between the layers.
Freeze for up to 2 months for the best quality.
When ready to serve, thaw the cookies at room temperature and decorate them with chocolate and candy eyes.
Can You Make These Halloween Spider Cookies Ahead?
Yes. You can bake the cookies one or two days before a Halloween party.
Store the undecorated cookies in an airtight container, then add the chocolate and candy eyes closer to serving time.
This method can make party preparation easier because the cookies are ready before you start decorating.
How to Serve Peanut Butter Spider Cookies
Serve these Halloween spider cookies on a dessert platter at Halloween parties, school events, family gatherings, fall bake sales, or movie nights.
For a complete Halloween party menu, pair the cookies with these Quick Halloween Appetizers from Quiky Kitchen.
If you are planning a larger family meal before dessert, you can also browse these Easy Dinner Recipes.
Frequently Asked Questions
What are Peanut Butter Spider Cookies?
Peanut Butter Spider Cookies are soft peanut butter cookies decorated with chocolate and candy eyes to look like spiders. They are a simple and festive Halloween dessert.
How do you make easy peanut butter spider cookies?
Make a basic peanut butter cookie dough, shape it into balls, bake the cookies, then add a chocolate candy to the center. Finish with piped chocolate legs and candy eyes.
Can I use crunchy peanut butter?
Yes. Crunchy peanut butter works if you prefer extra texture. Creamy peanut butter creates a smoother dough and a more traditional soft cookie.
What can I use instead of candy eyes?
Small pieces of white chocolate or white candy can be used instead. Add a tiny chocolate dot to create the pupils.
Can kids make these Halloween spider cookies?
Yes. Kids can help shape the dough and decorate the cooled cookies. An adult should handle the oven and melted chocolate.
Can I make these cookies without candy eyes?
Yes. The cookies will still look like spiders without candy eyes. You can create simple eyes using white and dark chocolate.
How long do peanut butter spider cookies last?
Store them in an airtight container at room temperature and enjoy them within several days for the best texture.
Can I freeze peanut butter spider cookies?
Yes. Freeze the baked cookies before decorating for the best results. Thaw them at room temperature and decorate before serving.
More Halloween Dessert Ideas
If you are creating a Halloween dessert table, these Peanut Butter Spider Cookies pair well with cupcakes, brownies, pumpkin desserts, chocolate treats, and other easy Halloween sweets.
For a sweet and savory Halloween spread, serve these cookies alongside 25 Quick Halloween Appetizers.
Peanut Butter Spider Cookies Recipe Card
Equipment
- Mixing bowls
- Electric mixer
- Measuring cups and spoons
- Baking sheet
- Parchment paper
- Cookie scoop
- Small piping bag or zip-top bag
- Cooling rack
Ingredients
Cookies
- 2 cups all-purpose flour
- 1 teaspoon baking soda
- ½ teaspoon salt
- ½ cup unsalted butter, softened
- ¾ cup creamy peanut butter
- ½ cup granulated sugar
- ½ cup brown sugar
- 1 large egg
- 1 teaspoon vanilla extract
Decoration
- 24 chocolate-covered peanut butter candies
- ½ cup semi-sweet chocolate or melting wafers
- 48 candy eyes
Instructions
- Preheat the oven to 350°F (175°C) and line a baking sheet with parchment paper.
- Whisk the flour, baking soda, and salt together.
- Beat the softened butter, peanut butter, granulated sugar, and brown sugar until creamy.
- Add the egg and vanilla extract and mix until combined.
- Gradually add the dry ingredients and mix until a soft dough forms.
- Scoop the dough into small portions and roll into balls.
- Place the dough balls on the prepared baking sheet.
- Bake for 10–12 minutes, until the edges are lightly golden and the centers remain soft.
- Immediately press one chocolate candy into the center of each warm cookie.
- Allow the cookies to cool completely.
- Melt the chocolate and transfer it to a piping bag or zip-top bag.
- Pipe thin chocolate lines around each candy to create the spider legs.
- Add two candy eyes to each spider.
- Allow the chocolate to set before serving.
Nutrition Information
Nutrition values will vary depending on the exact brands and quantities of ingredients used. For the most accurate information, calculate nutrition using the specific ingredients and serving size in your recipe.
Final Thoughts
These Peanut Butter Spider Cookies are an easy way to turn a classic peanut butter cookie into a fun Halloween dessert. With a soft cookie base, chocolate spider body, simple chocolate legs, and candy eyes, they look festive without requiring complicated decorating skills.
Whether you need easy peanut butter spider cookies for a party or simply want a fun Halloween baking project, this recipe is simple enough for beginners and enjoyable for the whole family.
The Best Peanut Butter Spider Cookies Recipe

Easy Peanut Butter Spider Cookies made with soft peanut butter cookies, chocolate spider legs, and candy eyes. A fun Halloween dessert for parties, kids, and fall baking.
Type: Dessert
Cuisine: American
Keywords: Peanut Butter Spider Cookies, Peanut Butter Spider Cookies Recipe, Easy Peanut Butter Spider Cookies, Halloween Spider Cookies, Spider Cookies, Peanut Butter Halloween Cookies, Easy Halloween Cookies
Recipe Yield: 24 cookies
Calories: 210 calories per cookie
Preparation Time: PT20M
Cooking Time: PT12M
Total Time: PT35M
Recipe Ingredients:
Recipe Instructions: Unwrap about 24 mini reese’s cups, place in a bowl and put in the freezer. This helps them to maintain their shape once added to the hot cookies. Preheat the oven to 350ºF. Mini Reese’s Peanut Butter Cups In a mixing bowl, combine the butter, brown sugar, and sugar. Beat with an electric mixer for 1 minute, until smooth and fluffy. ½ cup (113g) unsalted butter,½ cup (107g) brown sugar,⅓ cup (66g) granulated sugar Add in the peanut butter, egg, and vanilla extract, beat again, less than 1 minute. ¾ cup (201g) creamy peanut butter,1 large egg,1 tsp vanilla extract Add in the flour, baking soda, baking powder and salt, mixing on low or with a spatula just until combined. Be careful not to over mix. 1 ½ cups (180g) all purpose flour,1 tsp baking soda,½ tsp baking powder,½ tsp salt Use a small cookie scoop or tablespoon to form tablespoon sized balls from the dough. Roll the dough between your hands to form a uniform ball, then roll in granulated sugar. Place the cookies 2-3 inches apart on a silicone lined baking sheet and bake for 8-11 minutes or until the edges of the cookies begin to crack and turn golden in color. Granulated sugar Remove the cookies from the oven and press a mini reese’s cup into the center of each cookie. Allow the cookies to cool for 15-20 minutes before moving to cooling rack. Moving the cookies while they are still warm can cause the reese’s cup to sink, losing its shape. Place the chocolate chips and oil if needed in a microwave safe bowl. Microwave for 3 minutes on 50% power, stirring after each minute. Continue to microwave until fully melted. Transfer the melted chocolate into a squeeze bottle or a sandwich bag with the corner cut off. Draw 4 legs on each side of the cookies. 1/2 cup (85g) semi-sweet chocolate chips,½ tsp neutral oil Use a small amount of melted chocolate on the back of the candy eye balls to attach them to the reese’s cup. Allow the chocolate to set before moving the cookies to a serving platter. Candy eye balls Last Step: I’d love to hear what you think. Leave a rating and comment her